7 An In-depth Guide to Light Wood Frame Construction

Introduction to Light Wood Frame Construction
This section will provide a simple definition of light wood frame construction and a general understanding of how it works. This would include descriptions of the basic structure of a light wood frame building, the types of materials commonly used, and the architectural considerations involved.
This part will discuss the importance and prevalence of light wood frame construction in the modern construction industry. It would cover its usage in different types of buildings (such as residential, commercial, and even industrial to some extent) and in different geographical locations. The benefits of light wood frame construction, such as cost-effectiveness, ease of construction, and versatility, would also be highlighted.
The last section of the introduction will provide an overview of the rest of the chapter. It would briefly outline what each subsequent section will cover and how each contributes to the overall understanding of light wood frame construction. This would include a preview of the discussions on the components and processes of construction, the tools and safety measures, the sustainability and efficiency practices, and the advantages and limitations of light wood frame construction. This way, readers would have a clear roadmap of the chapter and know what to expect as they proceed.
The Core Components of Light Wood Frame Construction
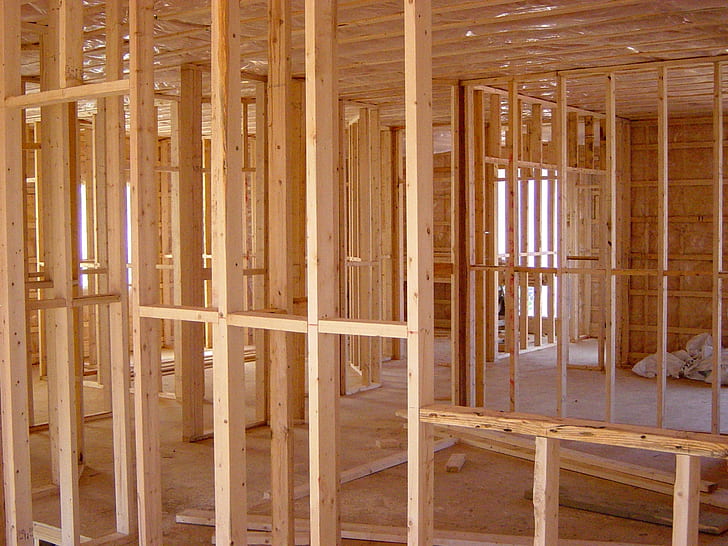
Studs: Explanation and Role
Definition and Physical Description
Studs are vertical framing members in light wood frame construction. They’re typically made of two-by-four or two-by-six pieces of lumber. Their dimensions can vary based on the design requirements and local building codes. They serve as the backbone of the wall structure, spaced uniformly along the wall length.
Role in Load Bearing
Studs primarily serve as load-bearing members. They transfer the weight of the roof, upper floors, and any other loads straight down to the foundation. The combination of multiple studs across the width of the wall allows the weight to be distributed evenly, increasing the overall strength and stability of the building.
Role in Wall Assembly
Apart from load-bearing, studs also play a critical role in wall assembly. They create the basic framework that supports the exterior and interior wall coverings, like sheathing and drywall. Further, they provide cavities for insulation and a routing path for utilities like electrical wiring and plumbing.
Joists: Explanation and Role
Definition and Physical Description
Joists are horizontal structural members used in light wood frame construction. They are typically made from two-by-eight, two-by-ten, or two-by-twelve pieces of lumber, depending on the load they’re designed to bear and the span they need to cover. The joists are placed parallel to each other, usually 12, 16, or 24 inches on center, depending on the structural requirements.
Role in Supporting Floors and Ceilings
The main function of joists is to provide support for floors and ceilings. They distribute the weight of the floor or ceiling evenly across the length of the structure, preventing sagging or collapse. Joists carry the load from the floor or ceiling and transfer it to the exterior walls and interior load-bearing walls or beams.
Role in Providing a Base for Other Components
Additionally, joists serve as a base for the installation of other components, such as subfloors, ceiling materials, and insulation. In floor assemblies, a layer of plywood or oriented strand board (OSB) is typically nailed or screwed to the top of the joists to create a subfloor. In ceiling assemblies, joists can provide a base for drywall or other ceiling finishes. They also create a space for insulation and for running utilities, including electrical wires, plumbing, and HVAC ductwork.
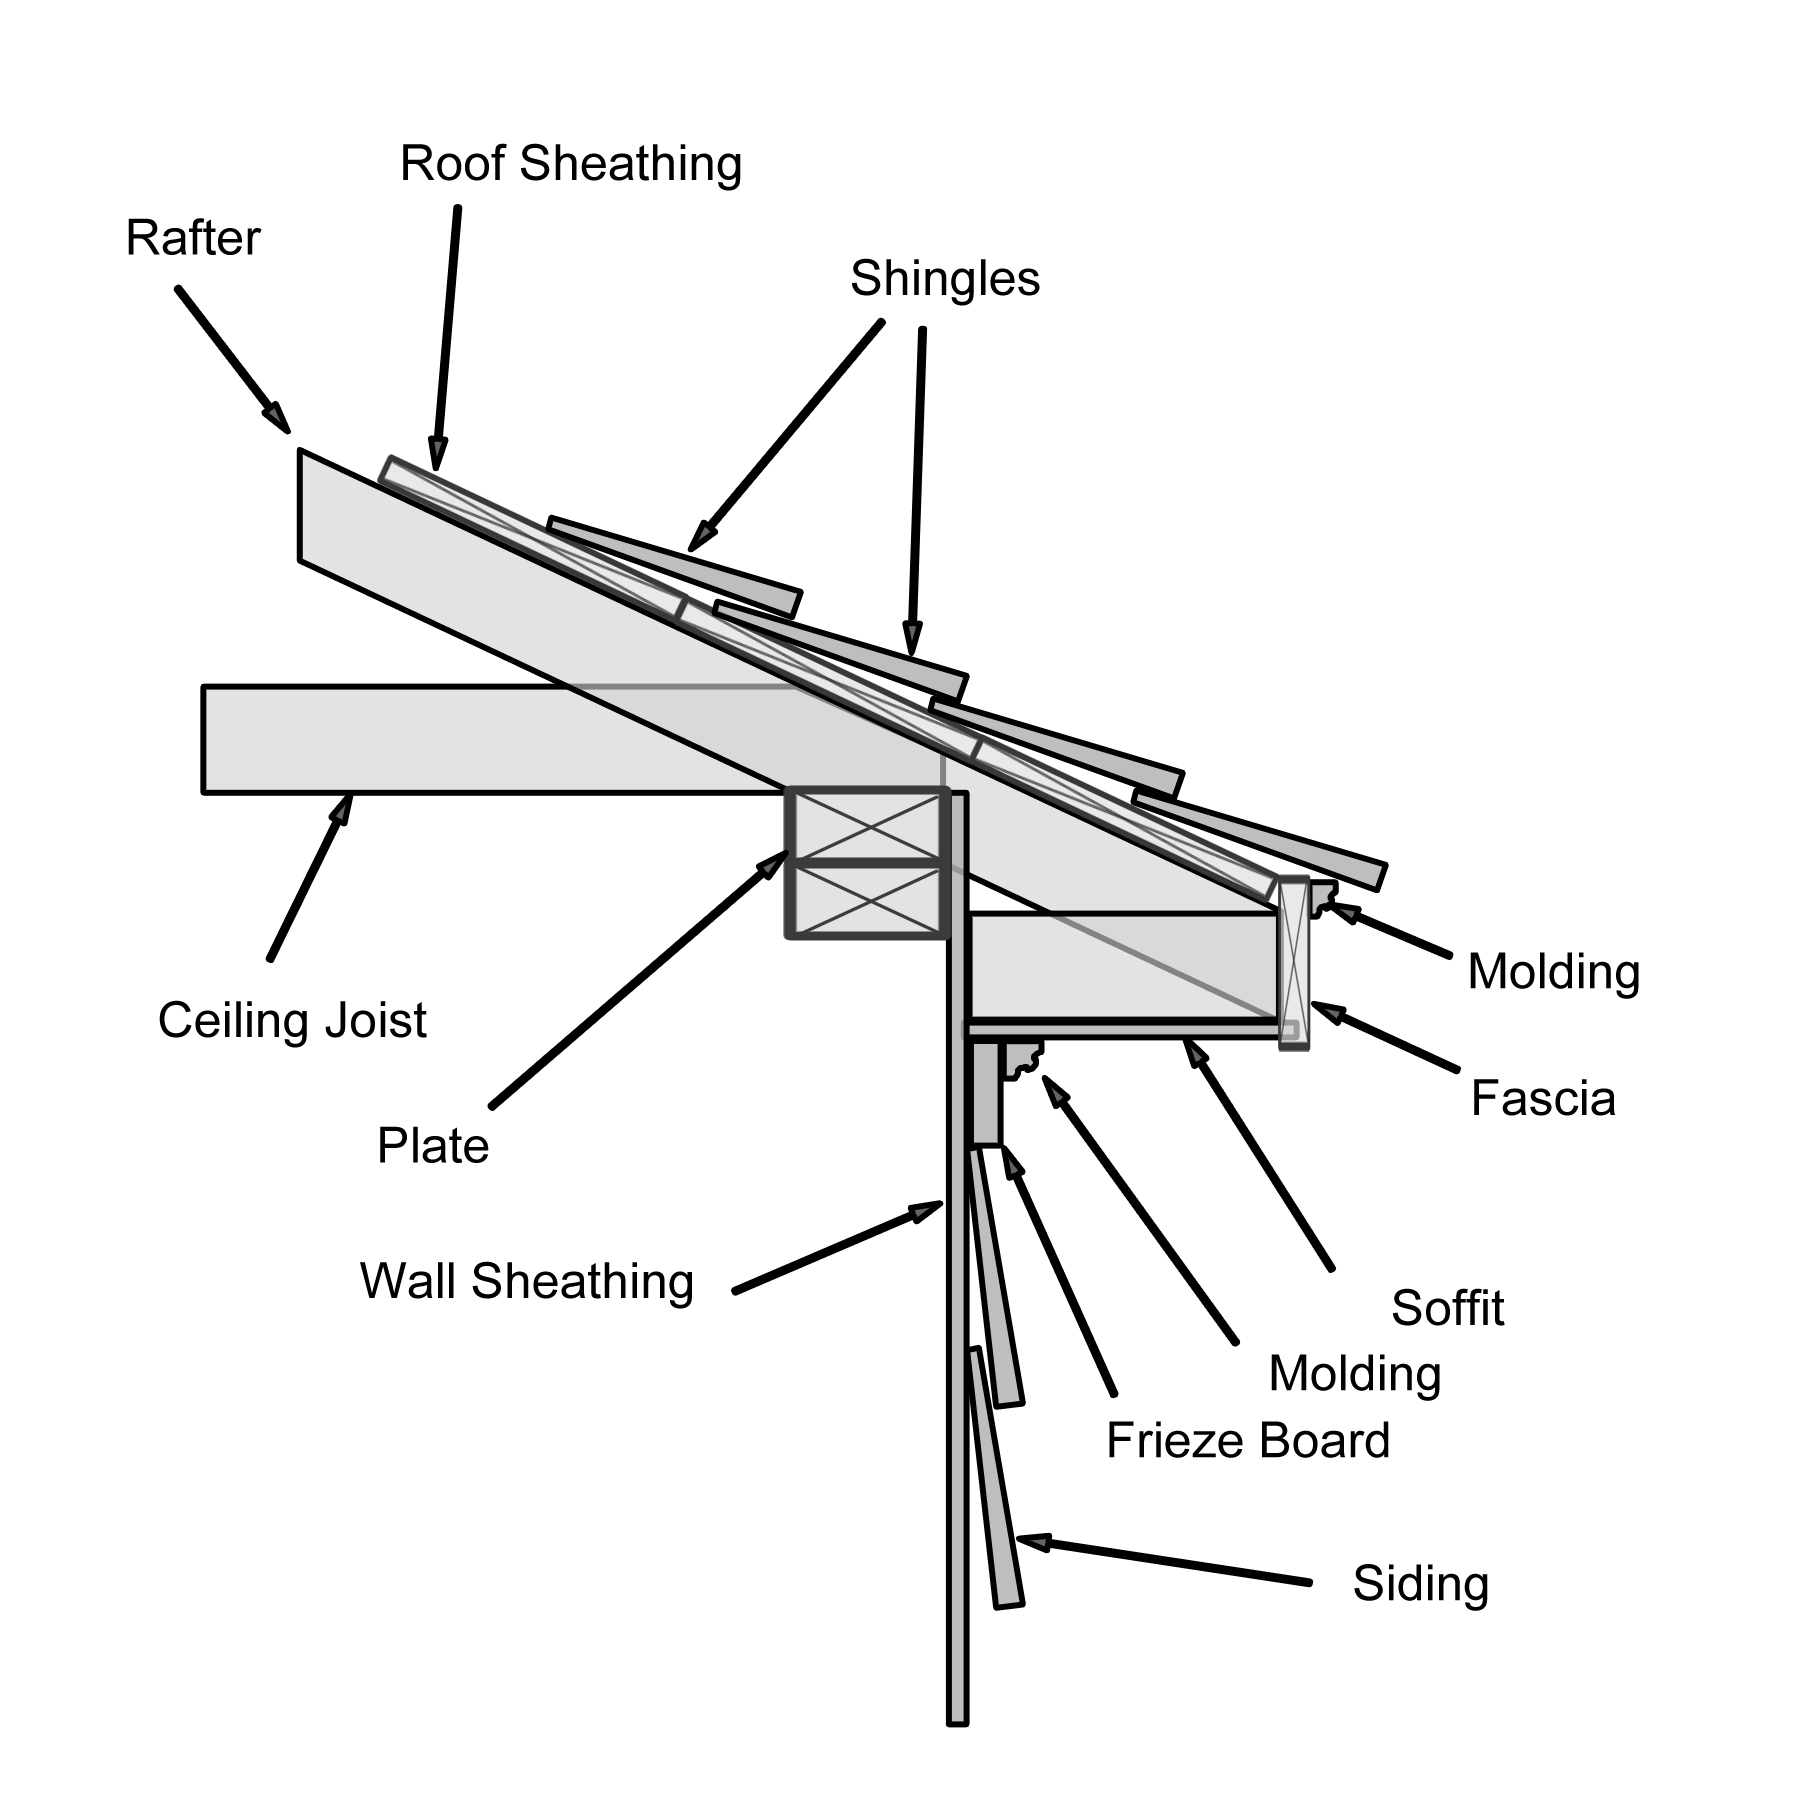
Rafters: Explanation and Role
Definition and Physical Description
Rafters are the sloping beams that support the roof of a light wood frame construction. They extend from the peak of the roof down to the exterior walls. Rafters are typically made of two-by-six, two-by-eight, two-by-ten, or even larger lumber, depending on the span, load, and local building codes. They’re installed in pairs, forming a shape like a ‘V’, and are spaced at regular intervals, typically 16 or 24 inches on center.
Role in Roof Structure
The primary function of rafters is to provide the main structural support for the roof. They bear the weight of the roofing materials and any additional load from wind, snow, or people working on the roof. The rafters transfer these loads to the exterior walls. The design and angle of the rafters define the shape and pitch of the roof, affecting the building’s drainage, aesthetic, and interior loft space.
Role in Providing a Base for Roofing Components
Apart from supporting the roof, rafters also act as a base for attaching other roofing components. A layer of sheathing, usually plywood or OSB, is secured to the top of the rafters, providing a flat and rigid surface for the application of roofing materials like shingles, tiles, or metal roofing. Rafters also provide space for insulation, typically installed between the rafters against the roof sheathing, and can accommodate vents and other elements necessary for a well-functioning roof system. They are essential for forming the building envelope and controlling heat transfer.
Sheathing: Explanation and Role
Definition and Physical Description
Role in Strengthening the Structure
Role as a Base for Other Materials
The Process of Light Wood Frame Construction

Pre-construction Phase: Site Preparation, Plan, and Design
Site Preparation
Building Plan
Design Considerations
Building the Foundation
The foundation is essential to any building, including light wood frame structures. It is responsible for transferring the weight of the building and all its contents to the ground, ensuring stability, and preventing movement caused by ground moisture, temperature changes, or seismic activity.
Before construction, the type of foundation appropriate for the building and site must be determined. Choices include slab-on-grade, crawlspace, and full basement foundations. Each has its advantages and requirements.
Depending on the foundation type, the process typically begins by digging to the necessary depth. For a slab foundation, a flat surface is prepared; for crawlspace or basement foundations, a hole is excavated. The bottom is then leveled and compacted.
Next, footings are installed. Footings are wider sections of concrete placed beneath the foundation walls to spread the building’s weight more evenly across the soil. They are usually reinforced with steel rebar to increase strength.
After footings are placed and set, foundation walls are constructed. For a slab foundation, the entire slab is poured at once. Once the concrete has hardened, waterproofing is applied to prevent moisture intrusion. The foundation must be inspected and approved before framing can begin. The construction of a solid and well-made foundation is critical to the stability and longevity of the light wood frame building.
Framing the Floors
Framing the Walls
Framing the Roof
Roof framing is the final structural step in light wood frame construction, creating the shape and structure that will protect the building and its occupants from the weather.
The process begins with the layout and installation of the ridge board, a horizontal piece of lumber that defines the peak of the roof. The ridge board’s length, position, and height will determine the roof’s size, slope, and style.
Next, rafters are cut and installed. These are the sloping beams that attach to the ridge board at the top and the wall plates at the bottom, creating the triangular shape of the roof. Rafters must be carefully measured, cut, and installed to ensure a symmetrical and structurally sound roof. They are typically spaced 16 or 24 inches apart, consistent with the rest of the framing.
Once all rafters are installed, collar ties or rafter ties might be added for additional strength and stability. These horizontal pieces of lumber connect opposing rafters and help to prevent the roof from spreading under heavy loads.
Finally, sheathing is nailed to the rafters, providing a flat, rigid surface for the roofing materials. Often, a layer of building paper or another type of underlayment is added on top of the sheathing before the final roofing material is installed.
A well-framed roof enhances the building’s aesthetics, provides critical protection against the elements, and contributes to the building’s overall structural integrity.

Installing Windows and Doors
Tools and Equipment Used in Light Wood Frame Construction

Manual Tools: Hammers, Saws, Squares, Levels, and Others
Hammers
Saws
Squares
Levels
Other tools
Power Tools: Drills, Circular Saws, Pneumatic Nailers, and Others
Drills
Power drills are essential for boring holes and driving screws in wood frame construction. They provide speed, consistency, and ease of use, especially when dealing with a large number of screws. Drill bits of various sizes are used for different tasks, from creating pilot holes for nails or screws to large-diameter holes for plumbing or electrical work.
Circular Saws
Circular saws are power tools designed for making straight cuts quickly and efficiently. They are particularly useful for cutting large sheets of plywood or OSB sheathing. With adjustable depth and angle settings, a circular saw is a versatile tool capable of many types of cuts.
Pneumatic Nailers
Pneumatic nailers, also known as nail guns, significantly speed up the process of driving nails. They use compressed air to drive nails with a single trigger pull, making them much faster and less labor-intensive than using a hammer. Different types of nailers, like framing, finish, and roofing, are used for specific tasks.
Other Power Tools
Other power tools commonly used in light wood frame construction include reciprocating saws, which are ideal for demolition or for cutting in tight spaces; power miter saws, which provide precise angled cuts for molding or framing; and routers, which are used for hollowing out areas in hard substances like wood or plastic. A table saw may also be used for making clean, straight cuts in large quantities of lumber. These power tools improve light wood frame construction efficiency, precision, and productivity.
Safety Measures in Light Wood Frame Construction

Importance of Safety in Construction
Safety is paramount in all aspects of construction, including light wood frame construction. Construction sites are inherently hazardous, with risks ranging from falls, tool and equipment injuries, to structural collapses. Ensuring safety minimizes these risks, preventing accidents that can lead to severe injuries, fatalities, project delays, and legal issues. A strong safety culture encourages everyone involved, from the workers to the management, to prioritize safety above all else. It not only safeguards the health and lives of the workers but also enhances productivity and the overall success of the construction project.
Safe Handling of Tools and Equipment
The safe handling of tools and equipment is crucial in light wood frame construction to prevent injuries and ensure an efficient working environment.
Proper Training
Workers should be properly trained on the use, maintenance, and safety features of each tool or piece of equipment. This training should include recognizing the potential hazards and the correct procedures to mitigate them.
Regular Inspection
Tools and equipment should be regularly inspected for any signs of wear, damage, or malfunction. Any defective equipment should be immediately repaired or replaced.
Correct Use
Tools should be used for their designated purposes only. Misuse can result in damage to the tool, substandard work, or even injuries. Power tools should never be left unattended when plugged in or still running.
Personal Protective Equipment
Appropriate personal protective equipment should always be worn when operating tools and machinery. This includes safety glasses, gloves, and hearing protection when using noisy power tools.
By following these guidelines, workers can significantly reduce the risk of accidents and injuries, making the construction site safer for everyone.
Use of Personal Protective Equipment
The use of Personal Protective Equipment (PPE) is a key part of safety measures in light wood frame construction. PPE is designed to protect workers from specific hazards that cannot be eliminated through engineering or administrative controls.
Hard Hats
Hard hats protect workers from head injuries due to falling objects, bumps, or electrical contact. They are required on most construction sites, especially where there is a risk of objects falling from above.
Safety Glasses/Goggles
Safety glasses or goggles protect the eyes from flying debris, dust, and harmful splashes. They are crucial when sawing, drilling, nailing, or doing any task that could propel particles into the air.
Gloves
Gloves protect hands from abrasions, lacerations, and punctures. Different gloves are used for different tasks, such as cut-resistant gloves for handling sharp objects and materials or insulated gloves for working in cold environments.
Safety Shoes/Boots
Safety shoes or boots protect feet from punctures, slips, falls, and electrical hazards. They often have steel toes to guard against crushing injuries and may be waterproof or insulated for specific environments.
The appropriate use of PPE is a fundamental aspect of a comprehensive safety program, offering an essential line of defense against workplace injuries.
Structural Safety Measures during Construction
Ensuring structural safety during construction involves several measures to ensure the structure’s stability throughout the construction process.
Proper Planning and Design: Thorough planning and design can identify potential structural issues and address them before construction begins. This includes understanding load paths and ensuring all components are sized correctly.
Quality Materials: Only quality, approved materials should be used. Inferior or damaged materials can compromise the structure’s stability.
Regular Inspections: Regular inspections during construction can catch potential problems early. This includes checking the alignment and level of the components, ensuring proper fastening, and verifying that construction is proceeding according to plan.
Temporary Supports: Temporary supports, or shoring, can be used to support parts of the structure during construction, particularly during the installation of large components or when making modifications to existing structures.
By taking these measures, builders can ensure the structural integrity of the building throughout the construction process, protecting both workers and the future occupants of the building.
Sustainable and Efficient Practices in Light Wood Frame Construction
Importance of Sustainability in the Construction Industry
The construction industry plays a crucial role in global sustainability efforts, given its significant impact on resource consumption, waste generation, and greenhouse gas emissions. Light wood frame construction is no exception. Sustainability in construction encompasses designing and building structures with consideration for their environmental, social, and economic impacts over the entire lifecycle. Adopting sustainable practices helps reduce the environmental footprint, enhances the well-being of the occupants, and provides long-term economic benefits. Thus, it’s an increasingly important aspect of the industry, driven by growing awareness of environmental issues, changing regulations, and shifting consumer preferences.
Efficient Use of Materials and Waste Reduction
Efficient use of materials and waste reduction are key aspects of sustainable light wood frame construction.
- Optimized Design: significant material savings can occur in the design phase. Designers can optimize building layouts and component sizing to minimize waste and maximize the use of each piece of lumber.
- Precise Measurement and Cutting: Accurate measurements and cuts help ensure that materials are used efficiently and waste is minimized. Modern technology, such as digital measuring tools and computer-controlled cutting equipment, can aid this.
- Recycling and Reusing: Where possible, waste materials should be recycled or reused. This includes both construction waste and deconstruction waste when renovating or demolishing existing structures.
- Job Site Practices: On the job site, practices such as sorting waste, protecting materials from damage or weather, and storing materials properly can reduce waste. Training workers on these practices and the importance of waste reduction can also help drive their implementation.
By adopting these strategies, builders can minimize the environmental impact of their projects, potentially reducing costs and contributing to a more sustainable construction industry.
Energy Efficiency in Light Wood Frame Buildings
Energy efficiency is another critical aspect of sustainability, and light wood frame buildings offer several advantages in this regard.
- Insulation: Wood has natural insulating properties, reducing the need for artificial heating or cooling. Further improvements can be achieved by filling the cavities in the frame with insulating materials such as fiberglass, foam, or cellulose.
- Air Sealing: Properly sealing the building envelope helps to prevent drafts and air leakage, enhancing energy efficiency. This includes sealing around doors, windows, and any other penetrations through the exterior walls or roof.
- Energy-Efficient Windows and Doors: Using energy-efficient windows and doors can significantly reduce heat loss in winter and heat gain in summer, reducing energy use for heating and cooling.
- Optimized Building Orientation: The orientation of the building can be optimized to take advantage of passive solar heating and natural ventilation, further improving energy efficiency.
Through these measures, light wood frame construction can provide comfortable, energy-efficient buildings that reduce energy costs and contribute to a lower carbon footprint.
Role of Light Wood Frame Construction in Green Building
Light wood frame construction plays a significant role in green building. Its sustainability features align well with the principles of green building, which include efficient use of resources, reduction of waste, creation of healthy living environments, and minimization of environmental impact. Wood is a renewable resource, and wood-frame buildings are typically more energy-efficient than other types. Additionally, wood sequesters carbon, contributing to the reduction of greenhouse gases. By embracing efficient, waste-reducing construction methods and integrating energy-saving features into the design, light wood frame construction can contribute significantly to the creation of green, sustainable buildings.
Advantages and Limitations of Light Wood Frame Construction
Advantages
Light wood frame construction has several advantages that have made it a preferred method for many types of buildings, especially residential ones.
- Cost-Effectiveness: Wood is a relatively inexpensive building material, and the simplicity of light wood frame construction often results in lower labor costs. In addition, the energy efficiency of wood-frame buildings can result in significant savings on utility bills over the building’s life.
- Speed of Construction: The lightness and ease of handling of wood, combined with the simplicity of the construction technique, can lead to shorter construction times. This can reduce the costs and risks associated with longer construction periods.
- Flexibility: Light wood frame construction is highly adaptable, allowing for a wide range of architectural styles and designs. Changes and modifications can also be easily made, even after construction is complete.
Limitations
Despite its numerous advantages, light wood frame construction also has limitations that must be considered in the design and construction process.
Fire Resistance: Although treatments can enhance the fire resistance of wood, it remains more susceptible to fire than some other building materials. Adequate fire safety measures, such as using fire-resistant materials in key areas and installing smoke alarms and sprinklers, are essential.
Durability: While wood can last for centuries under the right conditions, it can be susceptible to pests, rot, and decay if not properly protected. This requires careful design, good construction practices, and regular maintenance.
Sound Insulation: Light wood frame structures may not offer the same level of sound insulation as heavier construction methods. However, this can be improved with insulating materials and techniques, such as double-wall construction or sound-absorbing materials in wall and floor assemblies.
Conclusion
This chapter explores the core components, processes, and tools involved in light wood frame construction. We have also discussed the critical safety measures, sustainable practices, and the advantages and limitations of this construction method. With its affordability, versatility, and eco-friendly attributes, light wood frame construction has carved out an essential place in the construction industry. Looking to the future, as sustainability and efficiency becomes ever more crucial, the role of light wood frame construction is likely to grow. With continued innovations and improvements in design, materials, and techniques, it will remain a vital part of the construction landscape.
References
“Residential Construction Academy: House Wiring” – Gregory W Fletcher
“Construction: Principles, Materials, and Methods” – H. Leslie Simmons
“Modern Carpentry” – Willis H. Wagner, Howard Bud Smith
“Wood-Frame House Construction” – Gerald E. Sherwood, Robert C. Stroh
“Fundamentals of Building Construction: Materials and Methods” – Edward Allen, Joseph Iano
“Building Construction Illustrated” – Francis D. K. Ching
